Print and share
Admin Portal (UCEP) – Getting Started
The Spectrum Enterprise Admin Portal (also known as UCEP) is a web portal enabling site administrators to manage and configure features and settings. In this guide, we will review logging in and getting started with the Enterprise Admin Portal, covering the following topics:
Login and Overview
You will be provided an administrator username and password. The admin login will be in the form of (name.admin) and not a DID login, as those are for end users. If you cannot find your admin credentials, they should have been sent to your email address. If you still cannot locate them, please contact your project manager or contact the Spectrum Hosted Voice Customer Care team to reset, by dialing 611# from any Spectrum phone in your office.
Login to the Spectrum Enterprise Admin Portal here: https://uc.spectrumenterprise.net
Note: Upon signing in for the first time, you may be prompted to create a new password. The new password must be at least 6 characters long and contain at least one number.

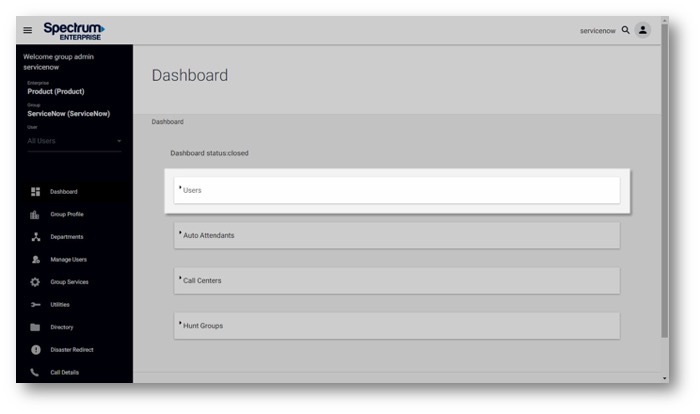
After login, you are routed to the Dashboard. The Dashboard displays the current state of all users, auto attendants, call centers and BroadWorks Anywhere services in the group. You can also use the dashboard to quickly find users to edit their information, settings and passcode information. The side menu gives you access to other settings, such as the following:
Note: Depending on your license type, your Dashboard may not display all of these features.

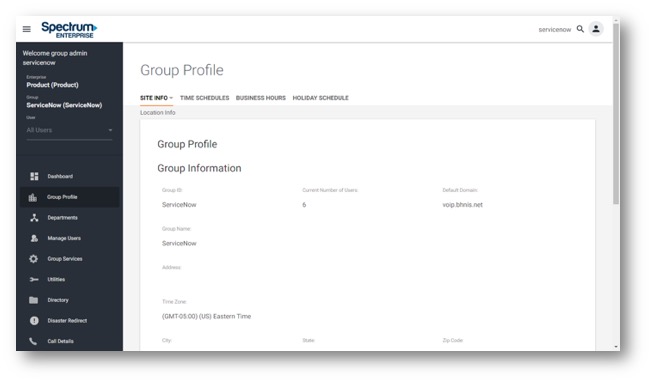
- Group Profile
- The Group Profile allows you to view and modify all of your group-level information such as time and holiday schedules, business hours, and call capacity. You can also manage other settings like changing your admin password and creating additional admins.
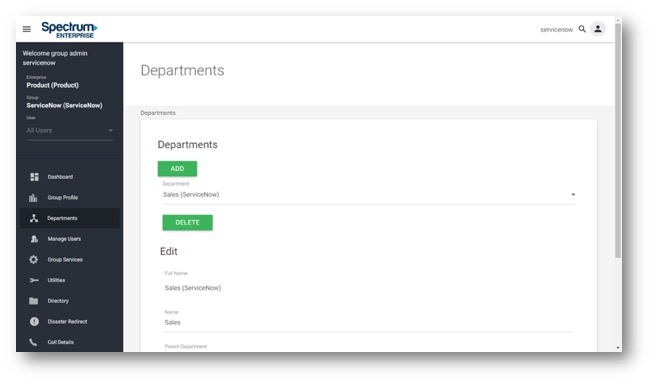
- Departments
- Departments represent subsets of users within a group, and users represent individual subscribers within a group or department.
- Manage Users
- The Manage Users tab allows you to manage user settings and modify user information. Here, you can reset web portal and voice portal passwords.
- Group Services
- Group Services allows you to make changes to your group profile, greetings, auto attendant, hunt groups, call centers and call park settings. Here, you can change your company's music-on-hold. If your employees use star codes to enable features such as call forwarding, you can find a list of feature access codes from within Group Services.
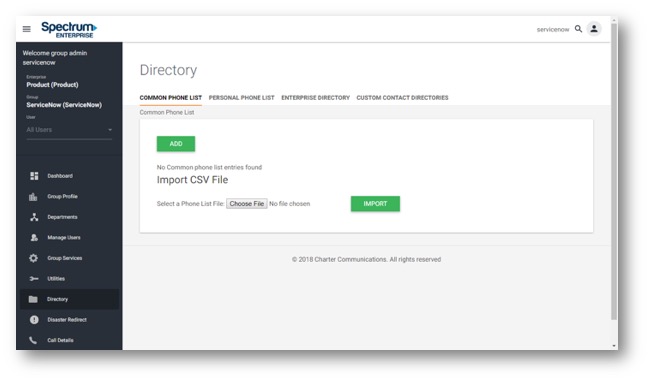
- Directory
- The Directory displays the enterprise directory of your system. From here you can access a summary or detailed version of your enterprise directory, which will consist of all of your active (or soon to be active) sites.
- The Common Phone List is an external phone list that can be uploaded in this portal and will share across your group via Unity software.
- Call Details
- In the Call Details tab, you can create and run call details reports on any user within your company. The report can show you a list of inbound, missed and outbound calls within a specified date range. After the report is generated, you can export the report either by email, PDF or CSV file.


Managing Your Line
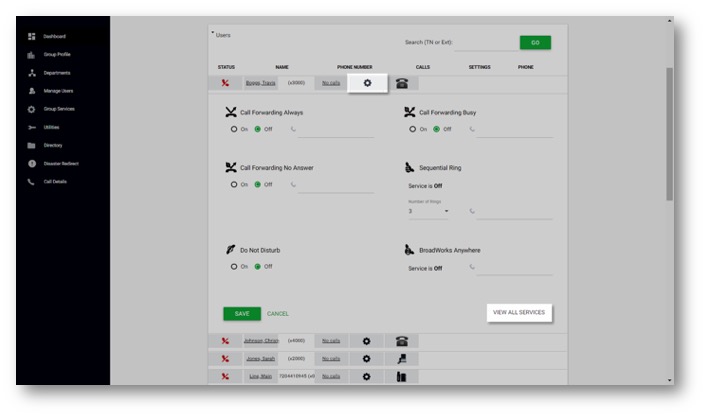
When provisioning your system, Spectrum builds a user for your Main Line. You can find this user listed among the other users within your company. As a system administrator, you may want to verify or edit where your Main Line is pointed. You can do this from the dashboard of your admin portal. Follow these steps:
- Go to the Users section and select the Settings icon for your Main Line user.
- To view all of the services and details, select VIEW ALL SERVICES and you will be routed to the Calling Features page for your Main Line user.
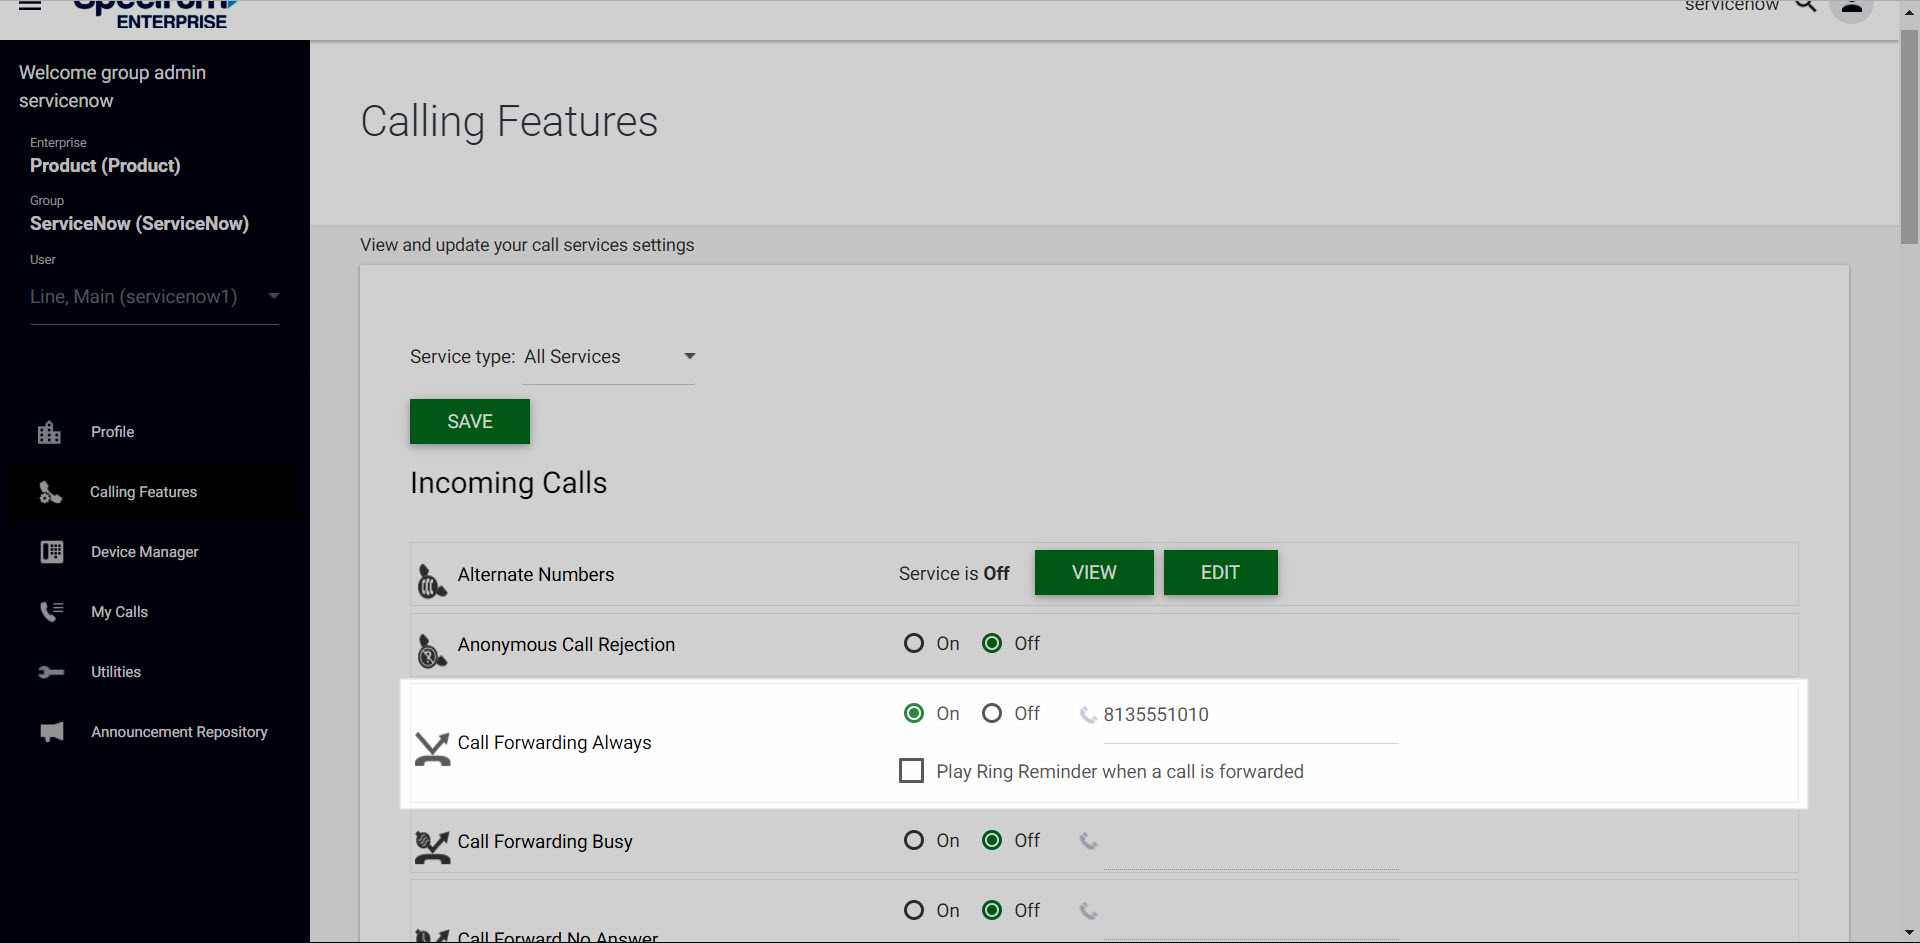
- For this type of user, typically one of two Call Forwarding features will be used. If your company is a 24/7 operation and has calls going to the same destination all of the time, Call Forwarding Always will be configured. The feature should be turned On and in the field you will see the phone number or extension for where calls are forwarded when the Main Line is called.
- To edit, type in a new phone number or extension and select the SAVE button. The system will now forward all calls to the new phone number or extension.
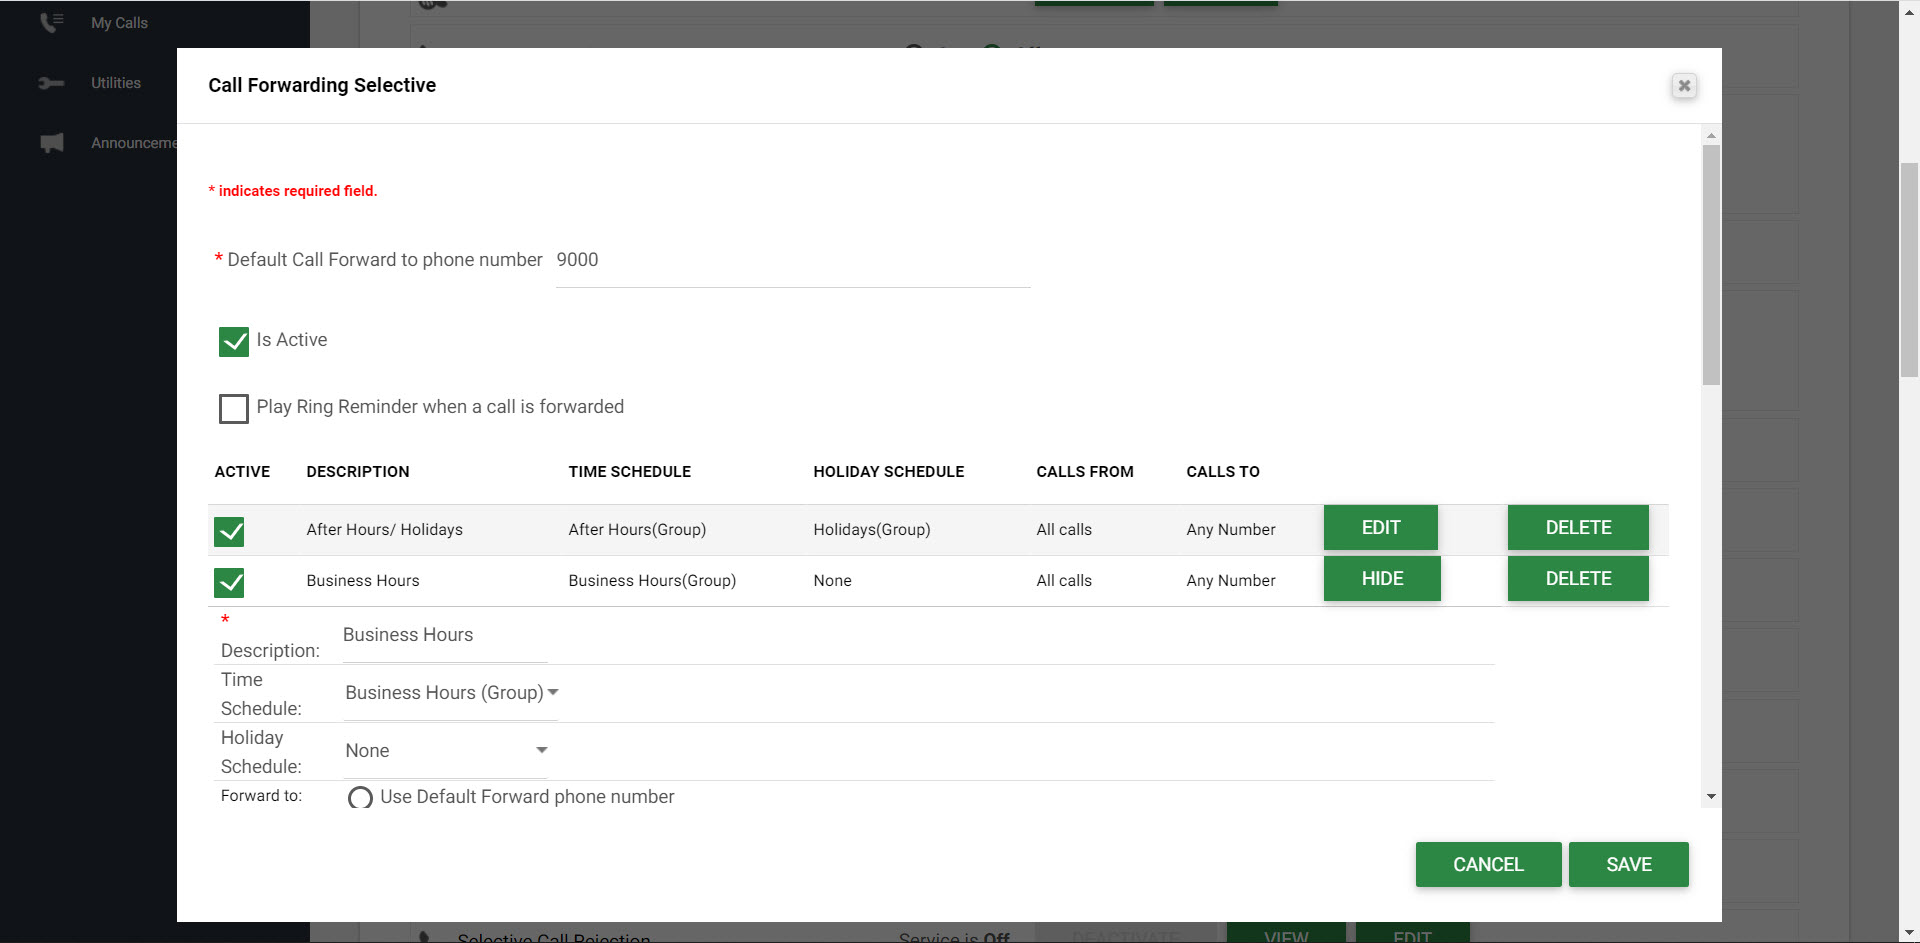
- If your company has incoming calls going to different destinations during Business Hours versus After Hours or Holidays, Call Forwarding Selective will be configured. In this case, next to the Call Forwarding Selective setting, this should be active and turned On.
- Select the VIEW button to view where your calls are being forwarded to and the criteria for when and where your calls are being forwarded.
- Select EDIT to modify this setting. A pop-up window displays your Business Hours and After Hours or Holidays.
- Select EDIT for the item you would like to modify.
- Edit the Description of this rule.
- Select the Time Schedule field or Holiday Schedule field to edit those rules, if created.
- In the Forward To area, you can choose from the following options:
- User Default Forward Phone Number
- Forward to another phone number
- Do Not Forward
- In the Calls From section, you can determine which type of calls to be forwarded. Options include:
- Any phone number
- Following phone numbers - If this option is selected, you have options of Any Private Number and Any Unavailable Number. There are fields for specific numbers where you have the ability to enter in specific phone numbers or area codes to be forwarded. If you want all calls from a specific area code to be forwarded, enter in the area code and then Star. The Star acts as a wildcard.


Once you have made your selections, select the SAVE button.
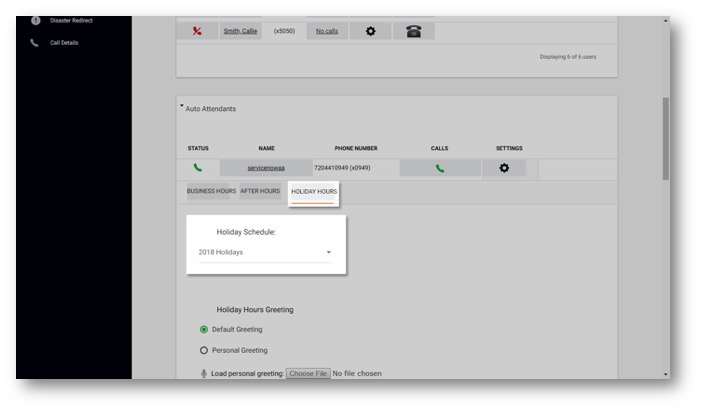
Creating or Editing a Holiday Schedule
As an administrator, you can create a Holiday Schedule for any holidays that your business is closed. Once the Holiday Schedule is applied, the system will send calls to your holiday hours treatment for any days within your Holiday Schedule. To create a Holiday Schedule, follow these steps:
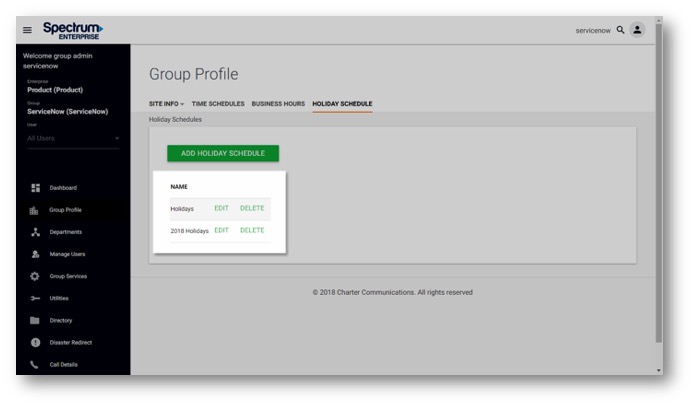
- From the Dashboard, select the Group Profile tab.
- Next, select the Holiday Schedule tab.
- To create a new Holiday Schedule, select the Add Holiday Schedule button.
- Enter a Holiday Schedule Name in the text box.
- To add a new holiday, enter the name of the holiday in a blank field under the Holiday column.
- Next, enter the first date that your office is closed in the Date Start column.
- In the Date End column, enter the date for the final day your office is closed. (Example: If it is a one-day holiday, the Date Start and Date End will be the same dates. If your office is closed for multiple dates, the Date Start and Date End will be different dates.)
- After making the changes, select the Save button.
- To edit an existing schedule, select Edit.
- To delete an existing schedule, select Delete.
Note: If a Holiday Schedule already exists, you will see it listed and can modify the existing one.


To apply a Holiday Schedule, follow these steps:
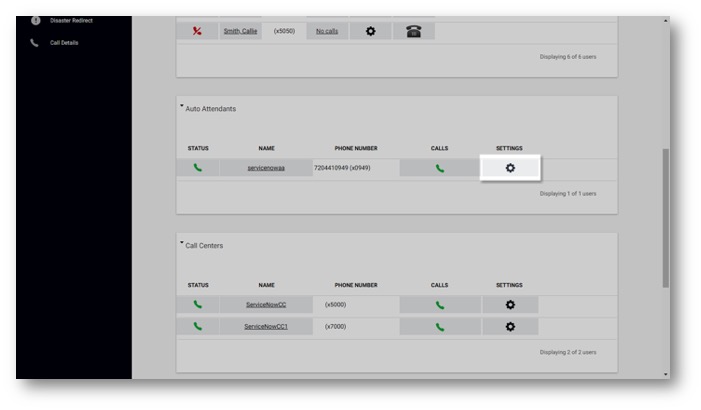
- From the Dashboard, select the item you want (Example: Main Number, Auto Attendant, Call Center, etc.) to apply the schedule to and select the Settings button.
- Select on the Holiday Hours tab.
- Select the previously created holiday schedule from the drop-down menu.
- Select the Save button to save your changes.
Note: Since most holidays do not fall on the same date every year, it is recommended to set yourself a calendar reminder to log in to the portal and update your Holiday Schedule. If your Holiday scheduled is not updated, your phones will ring per normal Business Hours even on dates in which the office is closed in observance of a holiday.
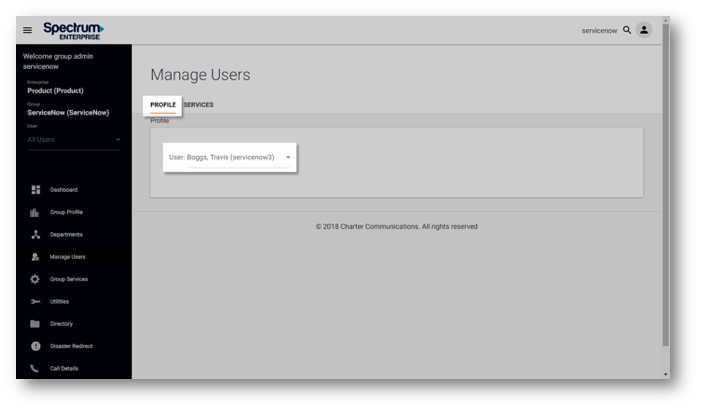
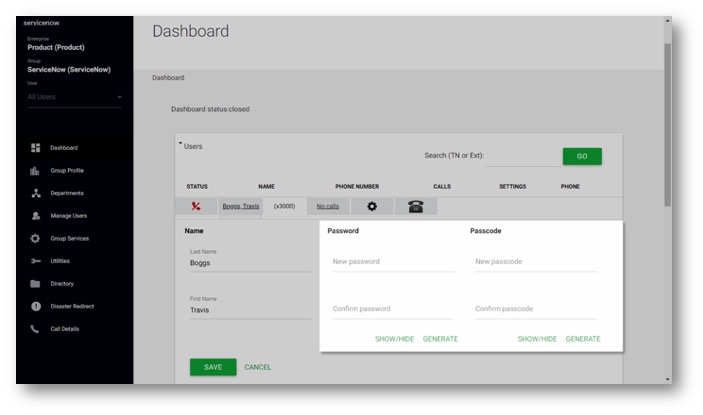
Resetting a User's Web Portal Password and/or Voice Portal Passcode
Although administrators can access user pages, the passwords and passcodes remain private. However, administrators can still reset a user's web portal password or voice portal passcode by issue a new one. To do so, follow these steps:
- From the Dashboard, select the Manage Users tab.
- Select the name of the user from the User drop-down menu in the Profile tab.
- Under the Password reset section, enter the new User Password or Voice Portal Passcode. You may also automatically create one by clicking Generate.
- Confirm the password/passcode by re-entering it in the Re-type field.
- To keep your changes, click Save (located at the bottom of the screen).

Note: You can also quickly access your user list from the Dashboard and change/reset a user's password or passcode here.

Resetting a User's Anywhere Connect or Unity Password
You can reset a user's Anywhere Connect or Unity password by following these steps:
- From the Dashboard, select the Manage Users tab.
- Select the name of the user from the User drop-down menu in the Profile tab.
- Under the Password reset section, enter the new User Password. You may also automatically create one by clicking Generate. This will change the password for the user's web portal access, Anywhere Connect, Unity or any other application assigned to them.
- Confirm the password/passcode by re-entering it in the Re-type field.
- To keep your changes, click Save.


Note: You can also quickly access your user list from the Dashboard and change/reset a user's password or passcode here.
Rename a User
The Enterprise Admin Portal allows you to easily rename a user in your group. To do so, follow these steps:
- From the Dashboard, select a user from the User section of the Dashboard.
- Enter the Last Name and First Name of the new user.
- Select Save to save your changes.

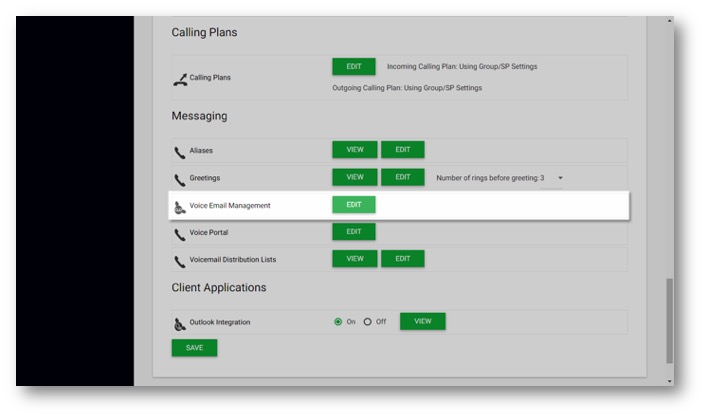
Setting up Voicemail-to-email for a User
From the Enterprise Admin Portal, you can set up voicemail-to-email settings for a user. To do so, follow these steps:
- From the Dashboard, select the Settings icon next to the user you would like to set up this feature for.
- Then select the View All Services link. A new page will open with additional features.
- Scroll to Messaging or choose messaging from the drop-down menu. Select Edit next to Voice Email Management.
- Select Use unified messaging to allow the user to access voicemail from the voice portal both from their phone and dialing in remotely, applications such as Anywhere Connect and Unity and email, if select in the option below.
- To enable the Message Waiting Indicator light, the red light on the phone alerting the user to new voicemail messages, check the box next to Use Phone Message Waiting Indicator.

There are three commonly used options:
- Only receive email of actual voice message .wav file:
- To have messages only forwarded to the user's email, select Forward it to this e-mail address and enter the user's email address.
- If you choose this option, the user will not be able to access your voicemail messages through the Voice Portal.
- Users will still need to access the Voice Portal to record their busy and no answer greetings.
- Receive email notifications to tell user to retrieve message via the phone/voice portal:
- If Unified Messaging is selected, the option Email address for new message notifications will send an email notification to the user's email indicating that a message has been left and it should be retrieved. This is just a notification and not the actual voicemail message. If selected, enter the user's email address.
- Retrieve voice messages via phone and receive email of actual voice message .wav file:
- To have the user receive a .wav file of the voicemail to their email, select the option Email a CC of the message to, and enter the user's email address here. They will receive a copy of the voicemail in their email as well as their phone.
Note: This method will never allow the voicemail box to fill up, as the voicemails will never be stored on the voicemail server.

Note: This is particularly useful if this voicemail box is to be accessed by multiple people and the notification is sent to an email distribution list (ex. support@acmecompany.com).

Note: If the user only ever listens to their messages via email, they will need to clear their voicemail box via the voice portal to avoid it filling up. If the user only ever plans to listen via email, they should use option 1, as listed above.

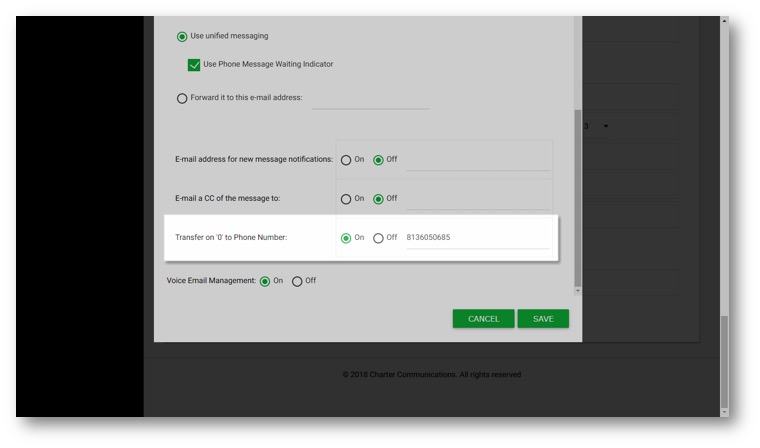
The last option in the Voice Messaging service is Transfer on ‘0’ to Phone Number. This allows callers that reach the voicemail to escape to a different number. To enable, select On and enter the extension or any 10-digit number in this field. Now, if the caller presses “0” during the greeting those callers would be automatically routed to that extension or phone number. It is recommended to have the User record this instruction in their greeting to notify the caller of this option. For example, “I am away from my desk, if you need immediate assistance press 0 to reach the receptionist.” Once done, select Save to save your settings.