
 Print and share
Messaging in Webex
Spaces and Teams
In the Webex app, your interactions are taking place in spaces and teams, where you can send messages, make calls, have video meetings, and share files and whiteboards. A space might be a direct message space, a space with a small group, or a space that is part of a larger team, created in Webex. Let’s break these down:
Direct Messages
A direct message is a message sent directly to one person. Direct messages remain between two people. You cannot add other people to the conversation later.
Spaces
Spaces work well for a group of people working on a specific topic. You might also see these referred to as standalone spaces.
Teams
If your original intention changes and a space outgrows its original purpose, you can create a team and then move a space into a team. Teams are typically used when working on a large project with people across multiple departments.
Navigate a Space
Whether it’s with a group or a direct message, spaces are where you’re collaborating and getting your work done. In the top header of each space is an activity menu. Click the activity menu tabs to get access to the different activities you can do:
- Messages—Messages is the default tab where you see all the communication within the space.
- People—The People tab is where you can see who is in the space. If you’re a moderator, you can add people to the space.
- Content—The Content tab is where you can view the files, whiteboards, links that have been shared in the space, and recordings of meetings.
- Schedule—Create a meeting from the space or get a list of meetings already scheduled for the space.
- Apps—Add website shortcuts to the space or choose from the list of available applications to include in the space.
Pinned Messages
You can pin messages in a space by clicking More actions next to a message and then Pin message. To view the pinned messages in a space, click the Pin icon in the activity menu.
Search
Click the Search icon in the activity menu of a space to search through the history of the space to find messages and files. You can use filters to narrow your search, as needed.
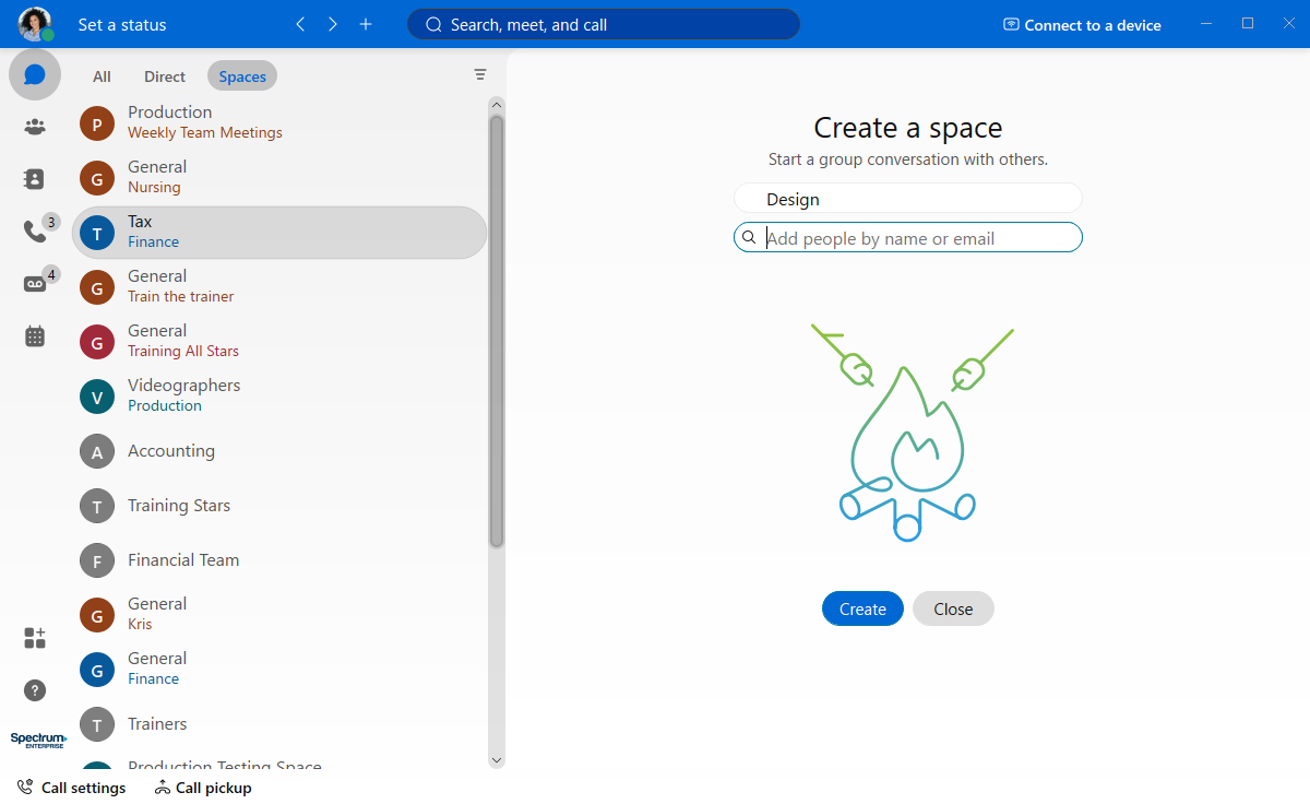
Create a Space
To collaborate with a group in Webex, you can create a space. Spaces work best for a group of people collaborating on a specific topic or project. In a space, you can send messages, make calls, have video meetings, share files and recordings, and use whiteboards.
If your scope expands from the original intention of the space, it might be time to create a team and move the space into a team. See Create a Team for more information.
- To create a space, in the app header, click the Plus icon.
- Select Create a space.
- Enter the name for the space.
- Enter the email address or name for each person you want to add to the space.
- Click Create.

Create a Team
Creating a team in Webex can help you collaborate and stay organized. Teams are especially helpful when you’re working on a large project with team members across multiple departments. For example, let’s say you’re organizing a large conference with several breakout sessions. You might create a Team for the entire conference, and then set up smaller, more specific spaces for each of the breakout sessions with the people who need to be in each one of those specific spaces. Alternately, if you’re organizing a small, office celebration, you might only need a standalone space for this. For more information on standalone spaces, see Create a Space.
Here is how to create a team:
- To create a team, click the Teams tab.
- Click the Create a Team icon to create a team.
- Enter the name of your team. If you’d like, you can also enter a description.
- Add people to the team by entering their name or email address and then selecting them from the drop-down list.
- Click Create.
- Once you have created a team, you can add smaller spaces within it. To create spaces within a team, click Create a space.

Tip: Here is where you might want to include the purpose of this team in Webex.

Note: Every team has at least one team space, General. People added to the team are automatically added to the General space.
Send Messages
Messages in Webex are where you chat with coworkers, exchanging content and ideas. You may send a message directly to a coworker or to a space you created. To send a message directly to a coworker:
- Select a person from the list in the left-hand navigation.
- Click the message area and then type your message. You can include files, add personality with emojis or animated GIFs, and add formatting or Markdown to make your messages stand out or be easier to read.
- Press Enter to send your message.

Send a File
You can share most types of files, with the largest file size being 2 GB. You can also preview documents without downloading them first. Acceptable file types: : .doc, .docx, .gif, .jpeg, .pdf, .png, .ppt, .pptx, .xls, and .xlsx.
- Drag and drop the file into the message area. Press Enter to send the file.
- You can also click the Attachment icon within the message area. This will bring up your system dialog box where you can select and upload the file. Press Enter to send a file.
- Lastly, you can click the Screen capture icon to select a part of your screen to capture. Then, press Enter to send the file.

There are multiple ways to send or share a file, here are a few ways:
Share Your Screen without Calling
You can easily share your screen without being in a meeting or on a call. This can be helpful if you just need to demonstrate something quickly in a one-on-one chat.
- While in a one-on-one message, click the Screen content icon.
- Choose whether you would like to share a screen or a specific application.
- The person you are sharing with is prompted to accept the screenshare.
- To stop sharing, click Stop at the top of the screenshare window.