
 Print and share
Getting Started
Download and Sign In (Activation Users)
As a Group or Enterprise administrator, you can conveniently associate an email address with your voice user and activate them through the Webex user management option in the Spectrum Enterprise Admin portal.
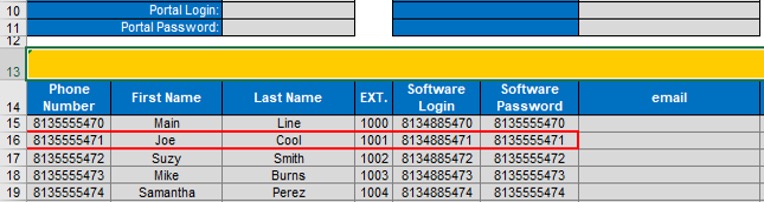
If your order includes UC with Webex, the activation user is already activated and uses the name and email address provided during the information gathering process when building the account. The activation user is usually the technical or primary point of contact and will be listed on the UC cut sheet as the first user below the main line.
The activation user will need to click here to download the Webex application. If the activation user has not been activated for Webex, that user should self-activate with Group or Enterprise admin credentials using the process described below. After activating the Group or Enterprise user, proceed with activating any other users for the company.
Activate Users
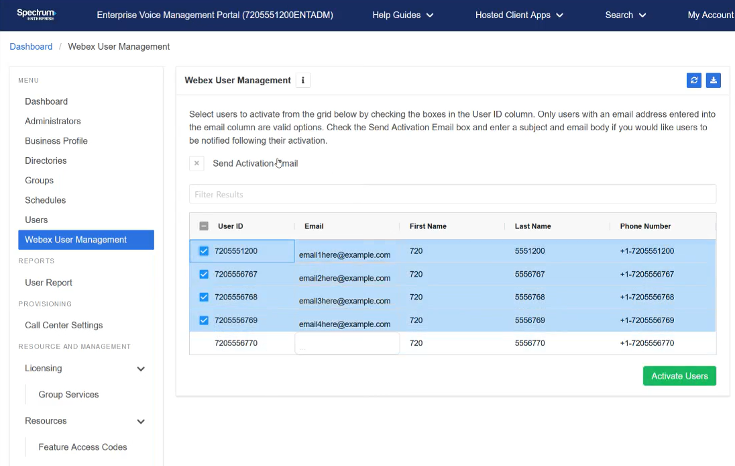
To activate your Webex users through the admin portal, follow these steps.
-
- From the dashboard, select Webex User Management.
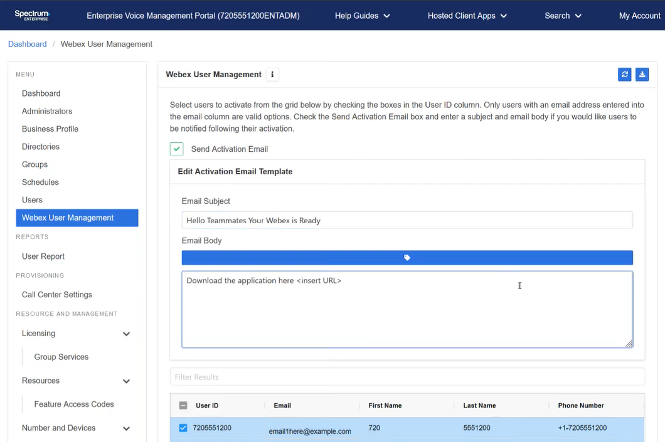
- Enter the email addresses of the users.
- Select users to activate them from the grid by checking the boxes in the User ID column. Note: Only users with an email address populated into the email column are valid options.
-
- (Optional) Check the Send Activation Email box and enter a subject and email body if you would like the users to be notified following their activation.
- Select Activate Users. You are prompted to confirm the action.
- A message appears that the request is queued for processing.
Download and Sign In
- Click here to download Webex.
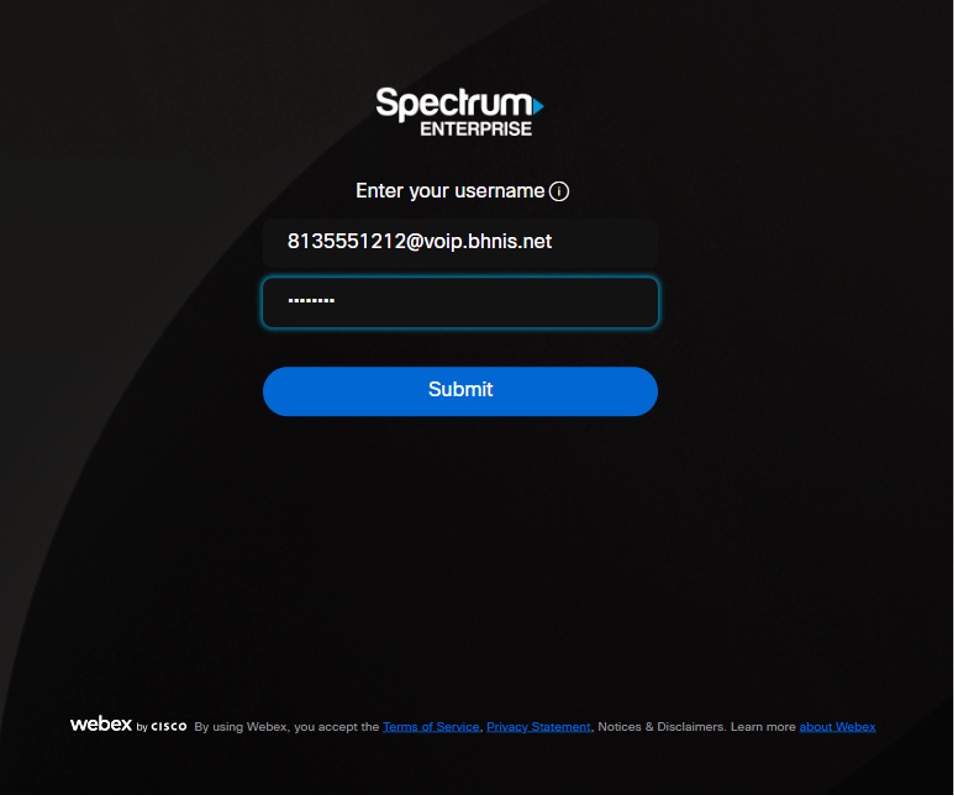
- Open Webex. Enter your email address

- Click Next
- Enter your software login and password. Note: The software login is a 10-digit phone number with @voip.bhnis.net added to the end so that it looks something like this - 5551234567@voip.bhnis.net. (Credentials found on the cutsheet provided)
- Click Submit.
Welcome to Webex!
Webex Overview
Let’s take a look at some of the main areas of this application:

-
- People and Spaces List
Appears on the left so you can get to them whenever you need to. At the top are your latest active spaces. If you've been added to a new team or space by anyone, you'll see it here too. You will see a bold space name when someone has posted a new message in space.
-
- Navigation Menu
Switch easily among your message, team, call, and meeting views. Messages appear by default, but your teams, calls, and meetings are a click away.
-
- Profile and Preferences
In the app header, click your profile to update your picture or name, access your settings and preferences, set your availability, and more.
-
- Search
In the app header, just click search, meet, and call to search through the history of your conversations to find people you're talking to, spaces you're in, messages you received, and files you need.
-
- Virtual Workspace
Messages are where you chat with colleagues. We keep these messages secure so you can feel confident sharing your work ideas in Webex.
Upload Your Picture
In Webex, make it easier for individuals to identify you by adding an image to your profile. Your profile depicts only your initials within a circle before you upload one. To upload your picture:
-
- In the app header, click your profile.
- Click Edit profile, then go to the Profile picture section.
- Click Change picture to browse for an image to upload.

- When you've made your changes, click Save.
Update Your Display Name
You can change the name of your Webex profile to show your preferred name. To update your display name:
-
- In the app header, click on your profile picture.
- Click Edit profile.
- Go to the Display name section.

- Click on your name and make your changes.
- Click Save.
Set a Custom Status
Create and post a unique status, so that your co-workers know if you’re away, working from home, or preparing for an important meeting. To set a custom status:
-
- In the app header, click Set a status.
- You can choose a status already entered, or you can click Set a status to create a new one.
Note: You can add up to five status options to the list, so they are quickly available. Each status has a maximum length of 75 characters and can also include emojis.

- To remove a selected status, click Clear status.
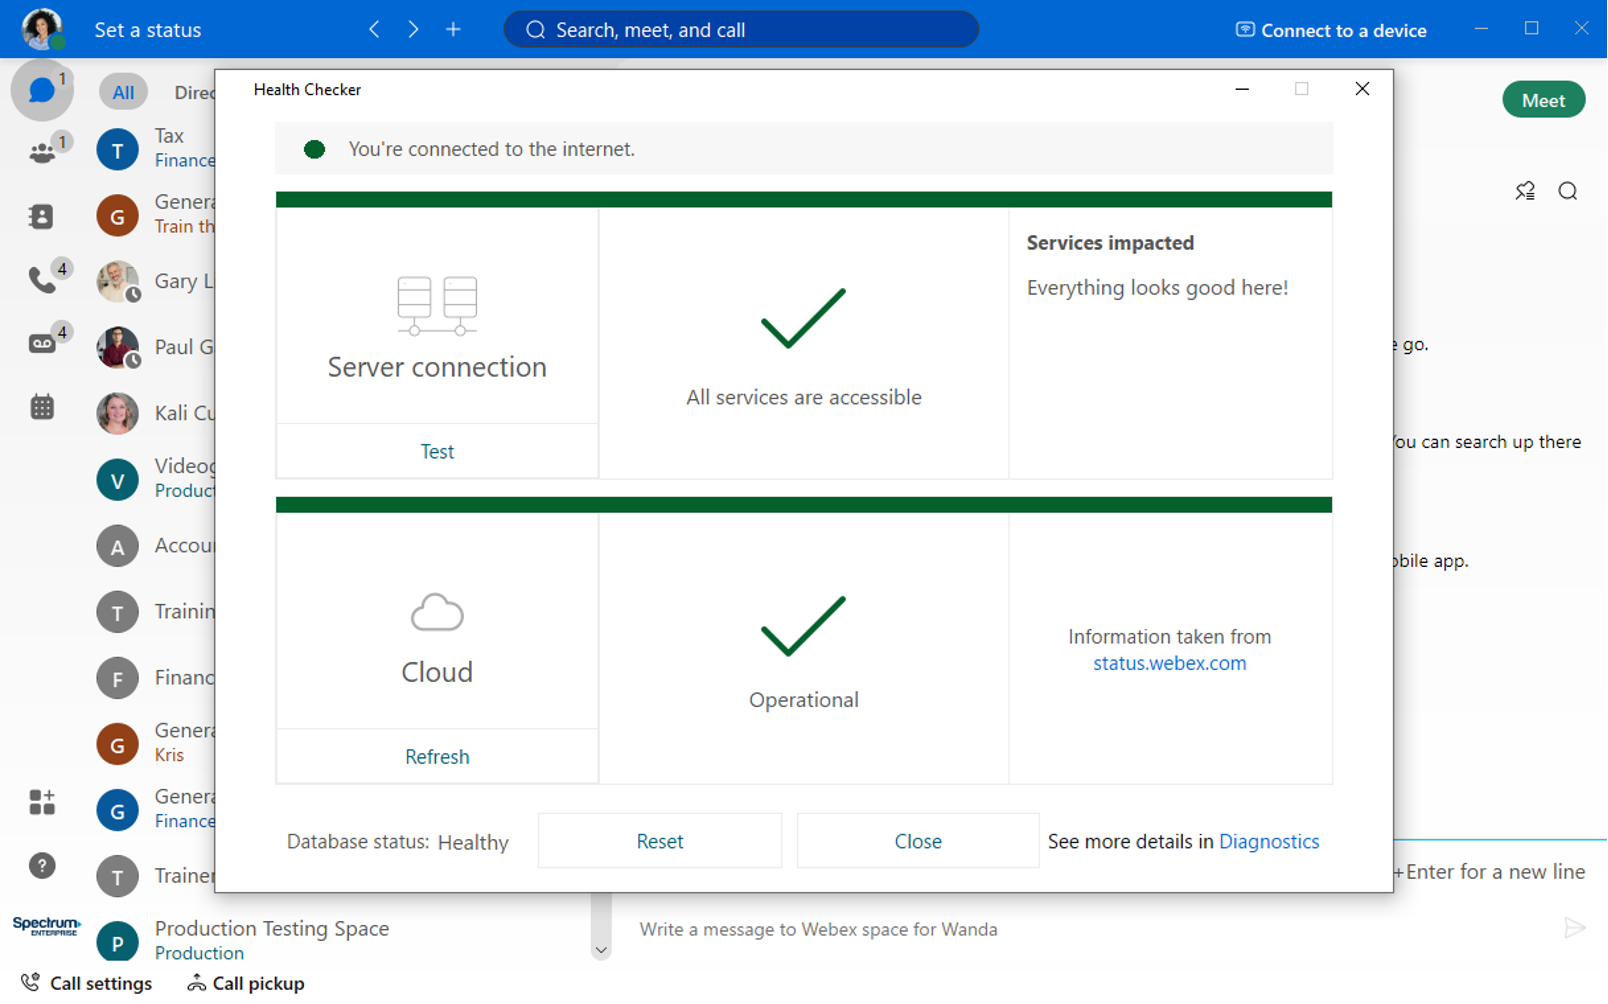
Test Your Connection with the Health Checker
You can use the Health Checker to confirm that your Webex services and connections are all okay. Test results show the status of the cloud, not your connection to the cloud.
-
- Click your profile picture.
- Then click Help.
- Click Health Checker.

-
- Here you can see:
- Internet - Make sure that your computer is connected to the Internet.
- Server Connection - Confirm that the Webex app can connect to the cloud. Click Test to verify if your computer can reach the cloud servers. If all services are accessible, a green checkmark appears. If a service connection fails because of a rejected certificate, a red stop sign with a link for more information and a list of affected components appears.
- Cloud - Get the status of the Cisco Webex cloud from status.webex.com. If there's an outage, the color of the Cloud section turns orange or red, depending on the severity of the outage.
- Here you can see:
E911 Address for Webex
UC with Webex from Spectrum is now integrated with E911 emergency services. With the E911 service, the Webex app automatically detects when you connect to a different network and requires you to update your address. This integration provides compliance to Ray Baum Act Phase II.
Keeping your location current in your Webex app is important so that emergency services can get to your exact location as quickly as possible if you need to make an emergency call, or someone else makes the call on your behalf using your Webex account. By choosing not to add your valid address to the E911 service, this could result in a delayed or impeded emergency service response.
Once setup, Webex will recognize known networks and not require address entry for recognized networks. If something changes on a frequently used network, like the name of an SSID, it may require the address to be entered to match the new network.
When you log in to Webex from your mobile or desktop client, you’ll receive the following prompts:
-
- First, you’ll see the location permission acknowledgement. Read carefully and select OK.
-
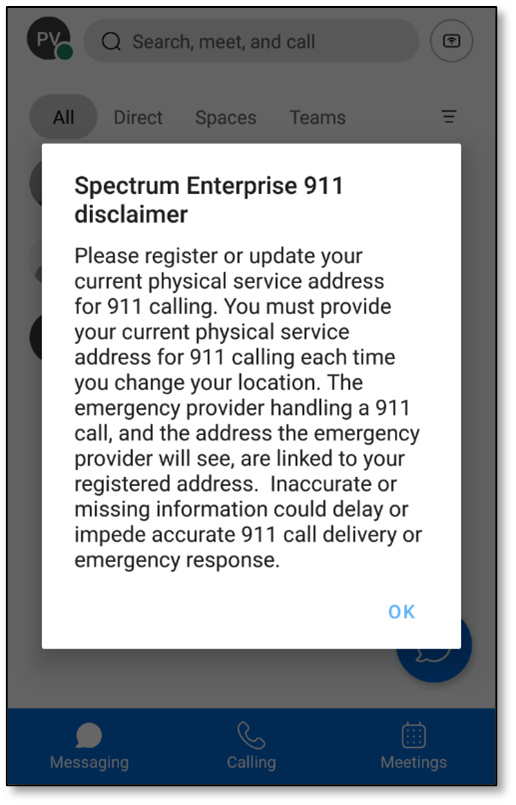
- Next, you’ll see the address required disclaimer. Read carefully and select ADD.

-
- Enter the required information for your current location.
Note: Make sure you use a unique Address description as an identifier for you to recognize. If you're connecting to a new network, but your physical address hasn't changed, you will still be prompted to enter the address to associate the network to. For example, perhaps you have set up a new Wi-Fi network at your home, when submitting your address, specify a unique Address description for that network (example “Home - Orbi 2022”).
-
- Select Save.

You may not be able to add your address in a few different scenarios:
- You're using a personal hotspot.
- If you’re on a mobile device and in transit, via car, train, or bus, for example, check the I'm using a personal hotspot check box. In this case, it is recommended to use your phones native dialer and service to place a 911 call.
- The Spectrum Enterprise UC service and E911 service integration within Webex app is only intended for use within the United States of America.
Manually Update Your E911 Address
If at any time, you need to add, view or revise your current E911 Address, you can access your E911 Service in the settings and make any necessary updates.
-
- In the app header, select your profile.
- Select Settings.
- Select Calls.
- Under E911 service, select Edit address.
- Enter the required information for your current location. Note: You can register up to 5 locations.
- Select Save.
