Anywhere Connect Android Phone and Tablet – Contacts
Table of contents
The Contacts tab can contain presence-enabled contacts and non presence-enabled contacts. Presence-enabled contacts are users with an Extensible Messaging and Presence Protocol (XMPP) address. These can be other Anywhere Connect users or users from federated systems such as Google Talk. Non presence-enabled contacts can be phone or conference numbers.
The Contacts tab also contains local contacts and directory contacts. Directory provides the company directory contacts.
This guide will give you an overview of how to add a contact, set as a favorite, and how to edit contacts in your Anywhere Connect mobile application.
Adding contacts
Your Contact List is used to store contacts with whom you frequently communicate and wish to share presence information. The Contact tab can contain the following types of contacts:
- Presence-enabled contacts – Users within your organization who also have Anywhere Connect.
- Non presence-enabled contacts – Contacts can be phone or conference numbers.
- Local contacts
- Directory contacts
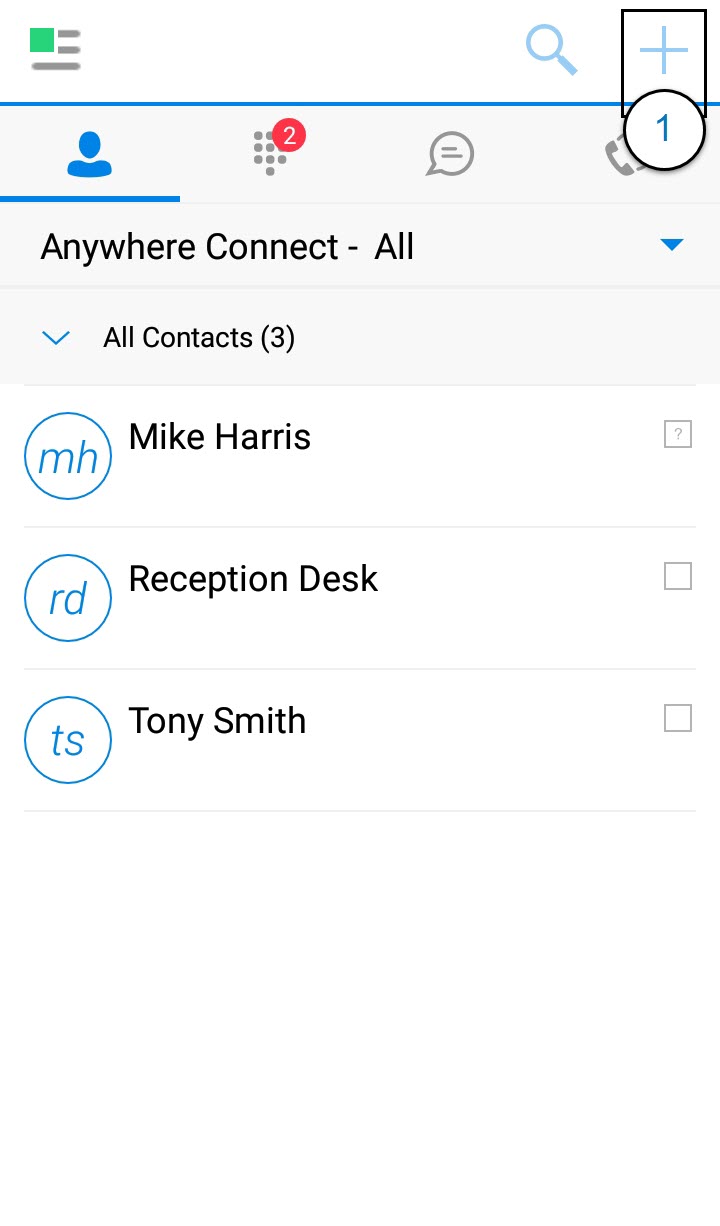
- To add a contact, from the Contacts window, select the Plus icon.
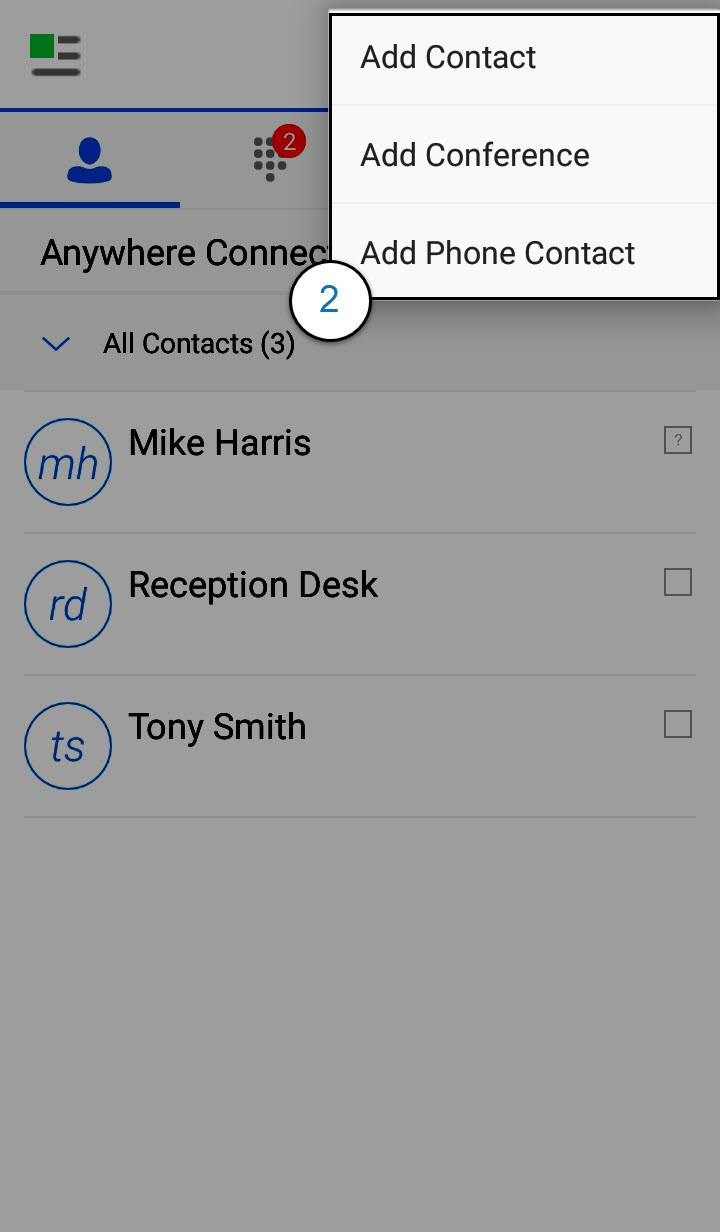
- Then, tap one of the following options: Add Contact, Add Conference or Add Local Contact.
- Once added, you can select on the Contacts tab to view the contact.
Note: Add Local Contact is used to access contact found in your company directory or other local address books and requires Anywhere Connect to have access to the local address book.
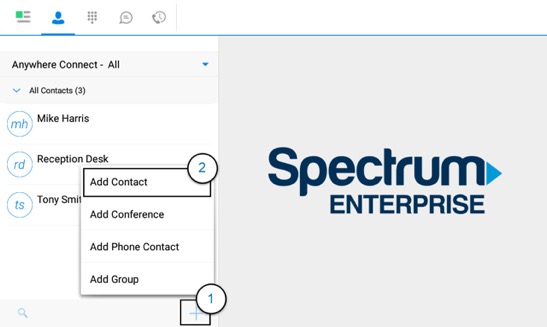
Android Tablet – To add a contact on your Android Tablet, follow the same steps, using the Plus icon located at the bottom of the Contacts window.
Set as favorite
To set a contact as a Favorite, follow these steps:
- Select a contact from the Contacts window.
- Then, tap the Star icon.
Android Tablet – Follow the same steps to set a Favorite on your Android Tablet.
Editing contacts
To edit contact;
- Select the contact’s name.
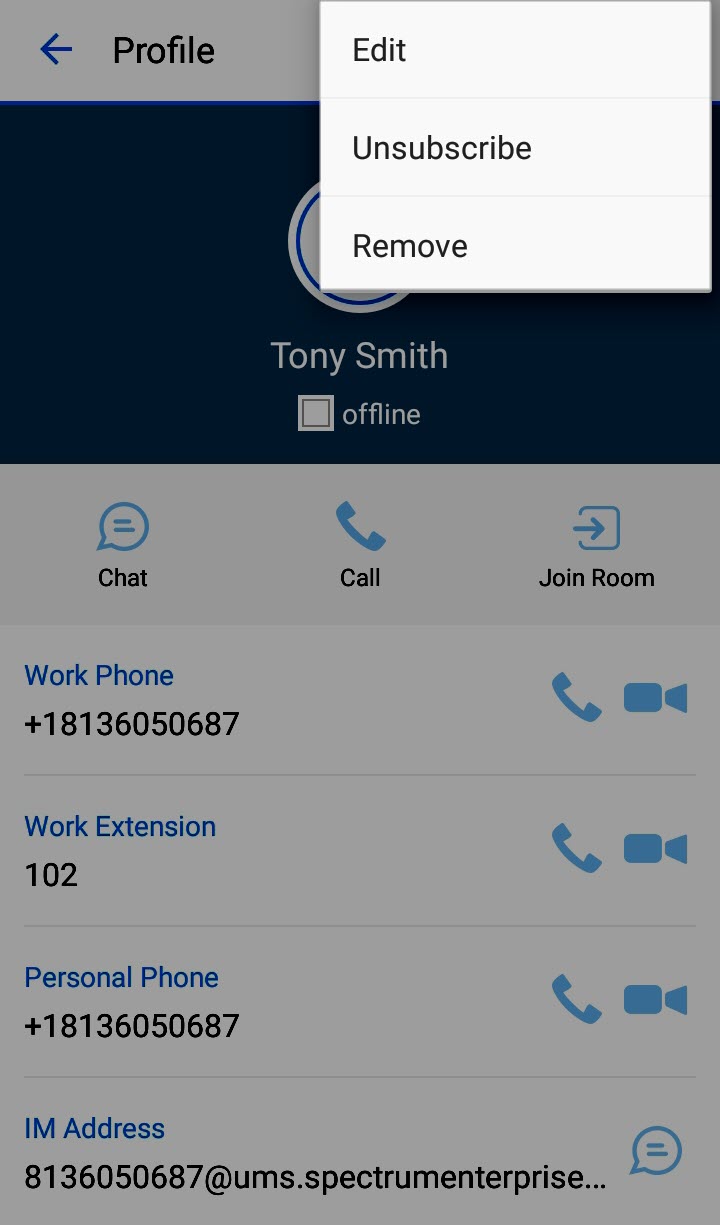
- Then, select Edit.
Edit opens the Contact Information dialog box where you can add, edit, or remove information. This works for both presence-enabled and non-presence-enabled contacts.
Unsubscribe removes the presence relationship between you and that contact. This means you do not see the contact’s presence information and your contact does not see yours. Select Subscribe to re-establish the presence relationship. An unsubscribed contact remains on your Contacts list and is always shown as “offline”.
Remove removes the contact from your Contacts list.
Searching contacts
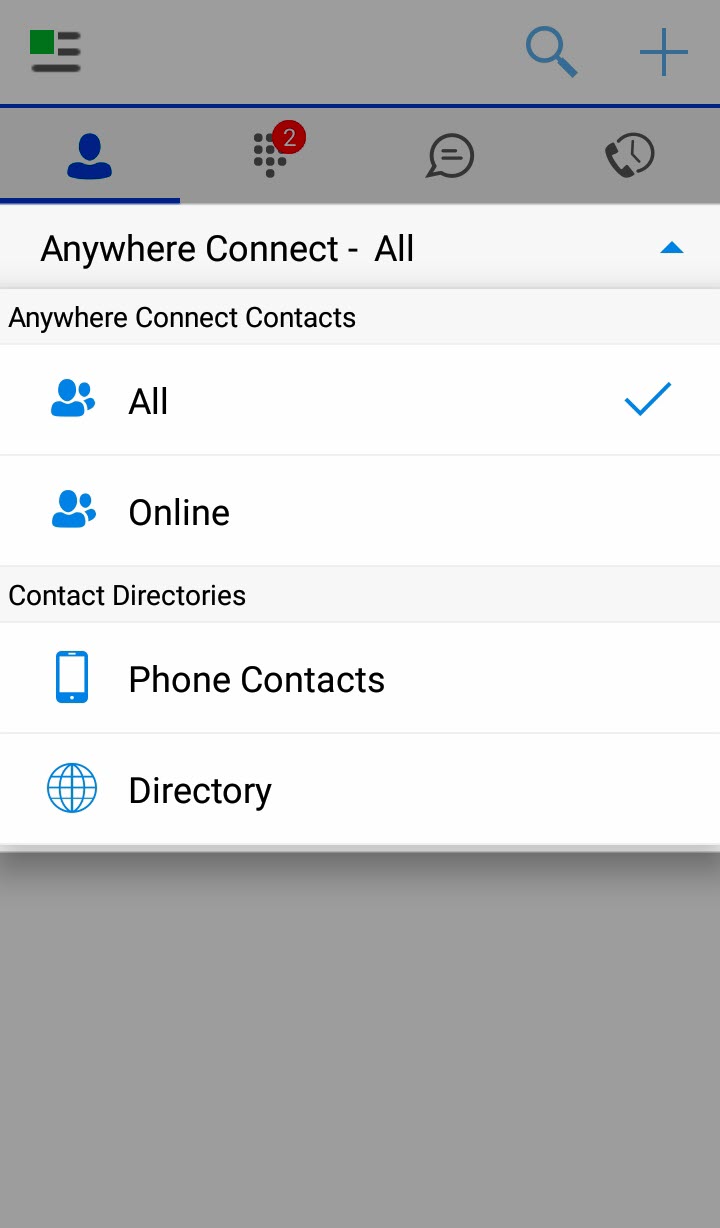
Search is performed in the Contacts tab. Typing in characters in the Search field starts the filtering process through the contacts. You can filter your search by selecting the Anywhere Connect drop-down at the top of the screen. This will provide the following options:
- All
- Online
- Local Address Book
- Directory

 Print and share