


 Print and share
Omnichannel Contact Center Help Guide
Introduction
The Omnichannel platform allows UC users to manage omni-channel conversations through the Unity client, in addition to normal VoIP related functionality. This is achieved through several Omnichannel components which are outlined below.
Queue: A Contact Center Queue is similar to a VoIP Call Center. It is a logical Group of Media Streams that are presented to the Agent as a single entity.
Media Stream: A Media Stream is the channel to the public, it represents a Web Chat or Callback client, an Email address, or a Twitter handle.
Note: If there are no Agents joined to the Media Stream then the conversation will be processed as “missed”.
Authorization
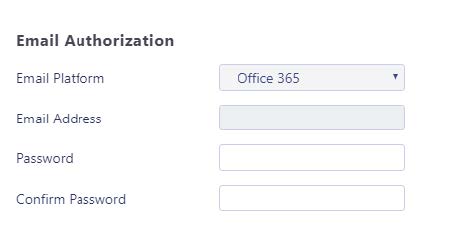
In the design process you would have been asked for an email address which is used to perform authorization requests for Email and Twitter Media Streams.
If there is one or more email addresses entered, then when creating Email and Twitter Media Streams you only need to provide a name – you won’t need to provide a Twitter or any email address details (including the email address). Users can set these of course, in which case they will be saved.
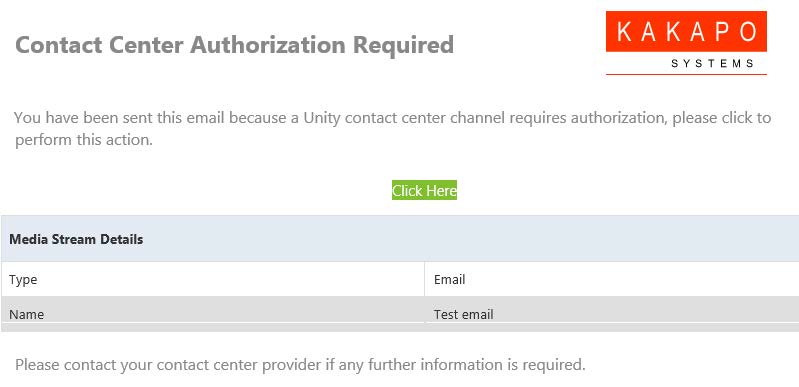
Any previously saved details from when the Media Stream was created will be displayed. If it’s a Twitter Media Stream and the handle was specified when it was created, then this page will redirect the user directly to Twitter to perform OAuth authorization.
End User Experience
You have now completed configuring the Unity Contact Center platform, including Queues, Media Streams and Agents. This section describes how the Agent performs Contact Center actions within their Unity client.
Joining or Leaving Queues
Agents join and leave Contact Center Queues exactly the same way they would with a Call Center Queue.
- Simply right click on the Queue and select Join or Leave.
- If icon next to the Queue is green then they are joined to the Queue, if it is red then they are not joined to the Queue.

Unity can be configured to automatically join all Contact Center Queues on start-up, as shown below.

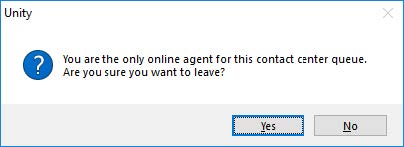
Unity can be configured to prompt the user that they are the last joined Agent when they attempt to leave a Queue, as shown below.

Adding/Removing Contact Center Statistics
To add Media Stream statistics to the Agent and Contact Center columns in the Personal Wallboard:
- Go to Settings.
- Select Service.
- Proceed to Columns.
- Then add the available Contact Center stats using the green add icon at the bottom right.

To remove Media Stream statistics:
- Click on the desired statistic and click the red minus icon at the bottom.
- You can reorder the statistics by selecting the statistic and using the arrows to move it up and down the column.
New Conversation Alert
When a new conversation is received, Unity can be configured to show a toast notification and or play an audio alert, as shown below.

At present the alert is just the IM audio alert played in a loop if playing for the alert duration, the ability to change the audio file shortly.
If it’s not configured to continue playing then it will just be played once, the same as when you receive an IM.
The summary notification:

Conversation
When an Agent is joined to the Contact Center Queue and available [although we know that the Agent may be available when the ACD state is unavailable, for example unavailable (Web Chat) all conversation alerts will be presented in the Activity List, as shown below.

The Activity column in the Activity Window informs the user what type of conversation it is and the From column will populate with the customer’s name, Unity will integrate with a CRM platform to show the contact details based on the Email address or number if configured in Settings. The duration shows the time since the conversation alert was received, and the status will always be “Unreserved” at first.
Managing Web Chat
When the Agent first sees the new Web Chat conversation in their Activity List, they can either:
- Right click to reserve the chat.
- You can also double click it and then click reserve, as shown below.

The difference is that by double-clicking the conversation first, the user can see any chat messages that have been entered by the visitor before reserving the conversation.
Reserve: To reserve a Web Chat conversation is to answer it. As soon as an Agent reserves the Web Chat then the routing phases will stop and the conversation will stay with that Agent. Any other Agents that have been alerted will be told that the conversation was reserved, so it will be removed from their Activity Window. The status of the conversation will change the “Reserved” and the duration will change to the time since the conversation was reserved. Unity will also change the ACD state of the Agent if set in the Agent Availability page in the portal.
Reject: Rejecting a conversation cancels the alert, so that the conversation will be removed from your Activity List. The Contact Center will act accordingly, by alerting another Agent if using circular of longest idle routing, or perhaps moving to the next phase. This will override the automatic bounce duration set in the routing phase, if the conversation is not reserved or rejected within the time stated in the “automatic bounce duration” for the routing phase, then the Unity client will automatically reject the conversation alert on behalf of the Agent.
If reserved, the Web Chat will stay in the Activity List for the duration of the conversation. The duration time in the brackets is the amount of time passed since the customer last sent a message which has not yet been replied to. This is configured in Settings>Agent>Conversations.
When a new message is received the “1 new message” alert will appear in the Status field, as shown below.

At any time the Unity user can double-click the conversation from the Activity List to see the Web Chat window.
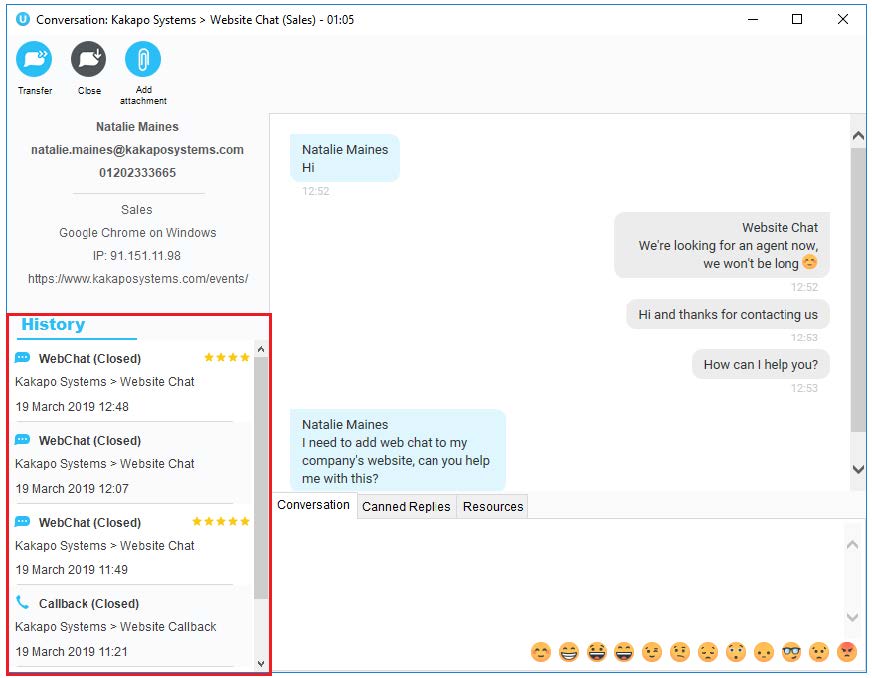
On the left of the Web Chat box is the customer’s name, and telephone number [if entered], along with the department chosen by the customer, the internet browser, their IP address and the website address that the Web Chat was started on.

- Simply click on the Email address to send an Email to the customer using the default Email program, or click on the number to immediately dial through Unity.
Conversation: This is where the user enters text to send to the customer. Simply type the message in the box and press Enter to send.
Emojis can also be added to a message by left clicking the relevant image. Or right click on an emoji to send it immediately.
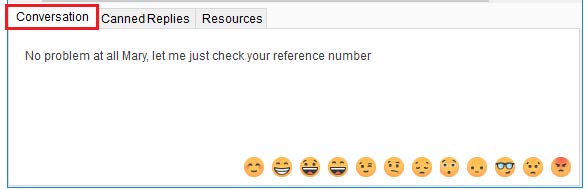
Canned Replies: This is where all canned replies entered at different levels in the portal are stored, the user simply double clicks on a reply to send it. The user can also use the search box to search for specific replies, based on the name or text entered in the portal.

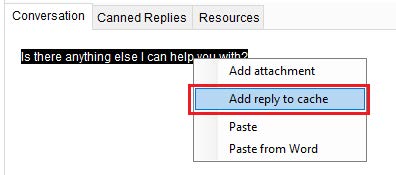
Add Reply to Cache
If a user is frequently typing the same message, they can add it to their reply cache which is stored locally on their machine.
- Simply type the message,
- Highlight it.
- Right click and select Add reply to cache.
Resources: All URLs and uploaded resources created in the portal are available in this tab, the user simply double clicks on a resource to send it. The user can also use the search box to search for specific resources, based on the filename/URL or description.

Attachments
- Right click to access the recent attachments (the cache saves the file path, if the file has moved folders then the Add attachment button will not work).
- To end a Web Chat click the Close button on the top of the conversation box, as shown below.

Note: Clicking the X will only close the Web Chat box, it will not end the Web Chat conversation.

Unity will not allow an Agent to close Unity while there are one or more reserved and open Contact Center conversations in place, all conversations must be transferred or closed before closing Unity.

History
Users can view the last 10 conversations that has taken place with the customer, e.g. Web Chat, Twitter and Callback conversations.
CRM Contacts & Leads
If the customer is in the integrated CRM platform then the Web Chat window will display two additional options at the top: “View contact in CRM” and “Add CRM call log entry”. Unity will automatically log a Web Chat entry against the contact or lead in the CRM platform. Click Add CRM log entry to manually add a custom entry.
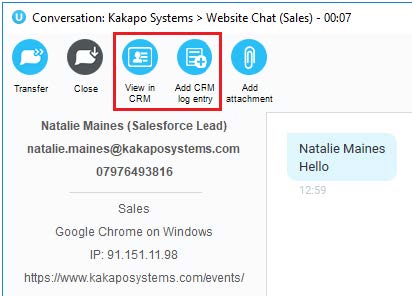
Users can also right click the conversation in the Activity List to access the same options.

Managing Callbacks
Similar to a Web Chat conversation, when a new Callback request comes into the Queue it will appear in the Activity List.

Agents can either reserve it and perform the Callback later, or they can double click the request to reserve and perform the Callback immediately.

The Callback request will stay in the Activity List of all users in the routing phase until the Callback has been reserved. If the Agent leaves the Queue, then any unreserved Callback for Media Streams within that Queue will be removed and will be refreshed/displayed when the Agent next joins the Queue. Once an Agent has reserved the Callback it will disappear for all other Agents and will remain in the reserved Agent’s Activity list, even in between Unity sessions in case the remote party needs to be called multiple times.

Note: The Callback will remain in the Activity List even if the Callback has been performed. The user needs to manually close the Callback for it to disappear. If the number provided is missing the area code, the Agent can select “copy number”, paste it into the dial pad and add the area code manually.
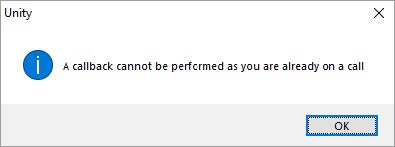
Unity will not allow a user to initiate a Callback when then are already on a call. If they try to initiate a Callback they will receive an error message.
When the user has finished dealing with the Callback, simply right click it and select Close Callback and it will disappear from the Activity List.
Managing Email
When an Email comes into the Queue it will appear in the Activity List.

Agents can reserve the conversation, reject the conversation or show the CRM contact in the integrated CRM platform (if applicable).

Once the Email conversation has been reserved the Agent opens the Email by:
- Double clicking it in the Activity List.
- The conversation window will then appear with the original Email from the customer at the bottom on the window, simply click at the top to start typing.
- Any attachments sent from the customer will appear below the subject line.
- Using the icons at the top of the Email window, Agents can transfer conversations, add attachments and add CRM log entries. Once the Agent has finished replying simply click the Send Message icon.
Note: That there is a blacklist for Email attachments, the list can be ound here.


Managing Twitter
Twitter conversations are loaded within 3 minutes of the tweet being sent from the customer, so the longest duration a tweet can take to come into Unity is 3 minutes and the quickest is 1 second, depending on where the 3-minute cycle is when the tweet is sent.
Note: that tweets/replies sent from Unity are delivered immediately to the customer.

To reserve a Twitter conversation:
- Right click it and select Reserve.

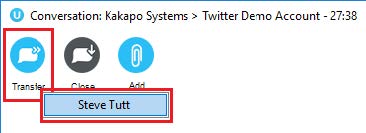
Transfer
- Click to transfer to a colleague, only those who are joined to the same Media Stream will be shown.
Attachments
- Right click to access the recent attachments (the cache saves the file path, if the file has moved folders then the Add attachment button will not work).

Unity will show 20 cached replies and attachments in Contact Center, plus more when Unity is running, but when it’s closing down only the latest 20 will be saved.
Direct Message Request
- Click the Direct Message icon to send a direct message request to the customer.
- This will then send the customer a link, which when clicked, will open up a Direct Message conversation.
- Once a Direct Message request has been sent to a customer the icon will disappear from the Twitter conversation window as the user cannot send the request twice.
Note: that the Media Stream Twitter settings must be configured to allow anyone to send Direct Messages. This is done in Settings and Privacy>Privacy and Safety>Direct Messages.


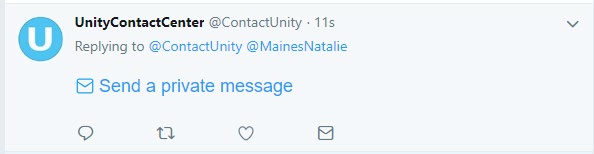
The DM/Private Message invitation will be displayed to the customer, as shown below.
CRM Automatic Contact Pop
Unity can now be configured to automatically pop a CRM contact (assuming a match was made on the CRM platform) when an Agent reserves a Contact Center conversation, as shown below.

If Unity has performed a contact pop from a CRM platform then the notification will be displayed with the relevant information, as shown below.

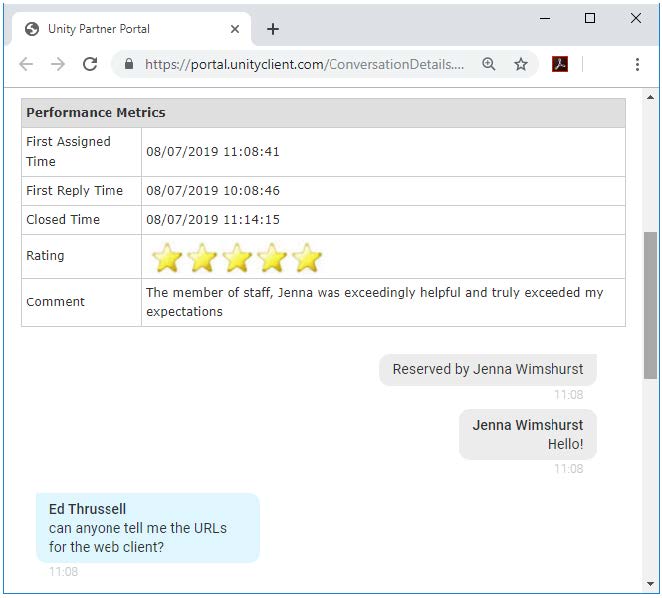
Viewing Historical Conversations
To drill-in to historical Web Chats, Twitter and Email conversations:
- Simply click on the Activity Log.
- Then click Conversations.
- Double click the chosen conversation to show the entire conversation and any relevant rating, as shown below.

Troubleshooting
Web Chat Hyperlinks
If an Agent has sent a link of a PDF and the customer is unable to directly click the link from the chat window then the customer will need to install the Adobe extension and ensure they have turned off auto download in their Google Chrome:
https://chrome.google.com/webstore/detail/pdf-viewer/oemmndcbldboiebfnladdacbdfmadadm?hl=en
Channel Is No Longer Active Error
If the Web Chat or Callback widget on your website displays the below error, then either the Media Stream has been deleted and the Java Script is still present in that webpage, or there is an error in the Java Script on that webpage.